Introduction
Building a cool and quiet system starts with airflow planning. You can buy a premium CPU cooler and a flagship GPU, yet temps will spike if case air cannot move in a clean path. The best fan configuration for pc case setups solves that with two principles: feed cool air to heat sources and remove hot air fast. That means placing the right fans in the right slots, balancing intake and exhaust, and tuning smart curves so fans react to real heat.
This guide shows you a clear, repeatable process. You will learn the pressure basics, which fans to use in each spot, and how to set layouts for mid towers, SFF builds, and full towers. We also cover AIO radiator placement, filters, and cable management that keeps the air path open. Then we finish with practical testing methods to confirm the plan works. With the goals defined, start with a quick layout that works for most cases, then refine from there.
TL;DR: The Best All-Purpose Layout
The quick recommendation for most mid-towers
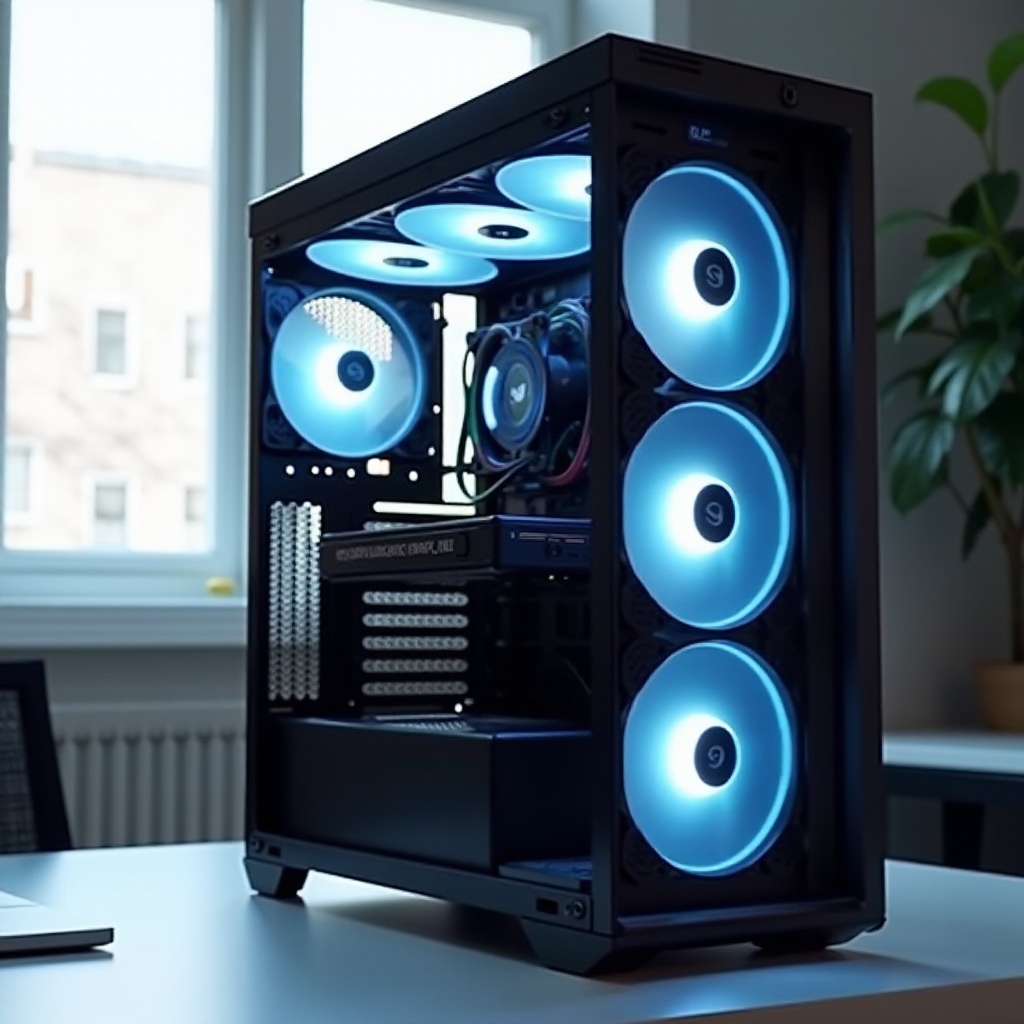
- Front: Two or three 120 or 140 mm intake fans behind a mesh front panel with dust filters.
- Rear: One 120 mm exhaust to pull heat off the CPU area.
- Top: One or two 120 or 140 mm exhaust fans toward the rear where heat collects.
- Pressure: Aim for slight positive pressure so more filtered air enters than leaves.
This baseline feeds the GPU with direct cool air and aligns with heat rising out the back and top. It stays quiet because large, slow fans do most of the work. Cables and drive cages should not block the front to back path.
When to deviate from the baseline
- If you mount a 240 or 360 mm AIO at the top as exhaust, keep three front intakes to maintain positive pressure.
- If your GPU runs hot, add a bottom intake under the card to push fresh air into its fans.
- If the front panel is closed or glass, pick static pressure fans and consider side or bottom intake where available.
- If your room is dusty or you have pets, add intake capacity and clean filters more often.
With a quick plan in mind, the next step explains why airflow and pressure choices matter, so your tweaks stay logical.
How PC Case Airflow Works
Intake vs. exhaust and pressure basics
Case fans create pressure zones. Positive pressure means slightly more intake airflow than exhaust. Air tries to escape through the case seams, so most dust gets caught by front filters. Negative pressure means more exhaust than intake. Air gets sucked through every small gap, usually unfiltered, so dust builds up fast. Balanced pressure sounds ideal, but small variations in fan speed and filter resistance often tilt it negative during real use.
Choose slight positive pressure for most builds. Feed cool air from the front and bottom, and let heat leave from the rear and top. Filters and fine mesh add resistance, so your intake fans must be strong enough to overcome that restriction.
Air pathing and component hotspots
Know where heat comes from to shape the air path:
– GPU: The biggest heat source in gaming and many creator tasks; it needs direct, cool intake.
– CPU: Needs steady flow or an AIO radiator that can dump heat quickly.
– Motherboard VRM, SSDs, and RAM: Prefer consistent airflow across the board rather than direct blasts.
Guide air straight across the mainboard, not in circles. Avoid a top front exhaust that steals fresh air before it reaches the GPU. Keep at least a small gap between fans and tight grills to reduce turbulence. With the physics clear, choose the right fan types for each location.
Choosing Fans for Each Position
Airflow vs. static pressure fans
Use static pressure fans where air must pass through dense fins or restrictive panels. Best placements include radiators, heatsinks, tight front panels, foam filters, and fine mesh. Use airflow fans where resistance is low, such as open top or rear vents. Mixing types is normal: pressure fans at the front or on radiators, airflow fans on the top and rear.
120 mm vs. 140 mm vs. 180 mm options
- 120 mm: Fits everywhere, flexible curves, but needs higher RPM to match the airflow of larger fans.
- 140 mm: Better airflow per rpm and usually quieter for a given CFM. Prefer 140 mm where your case allows.
- 180 mm and larger: Excellent for specialty high airflow cases. They move big air at low rpm but require compatible mounts and careful positioning to avoid dead zones.
Size choice sets your noise floor. Larger fans turning slowly often win for silence, provided the case supports them.
Bearing types, quality, and longevity
Bearings influence noise and lifespan:
– Fluid dynamic and similar designs: Quiet and long-lived, ideal for daily drivers.
– Ball bearings: Durable at high temperatures, sometimes noisier at low rpm.
– Magnetic levitation: Premium smoothness, low friction, and excellent longevity.
Pick reputable brands, check the minimum rpm, and seek smooth ramping. Next, drop those fan choices into proven layouts for your case size.
Proven Layouts for Common Case Sizes
Mid-tower balanced pressure: 2 to 3 front intake, 1 rear exhaust, 1 to 2 top exhaust
This arrangement is the best fan configuration for pc case standards in mid towers. Use two or three front intakes to feed the GPU and motherboard, a single rear exhaust to pull heat from the CPU socket, and one or two top exhausts near the rear to clear rising heat. Keep top fans slightly behind the top front edge so they do not capture fresh intake air prematurely. Adjust curves so front intake responds to GPU load and top exhaust responds to CPU load.
ITX and SFF strategies and side or bottom intakes
Small cases rely on direct, short paths:
– Use side or bottom intake that blows straight into the GPU.
– Exhaust through the top or rear with the least resistance possible.
– Pick slim fans where panels and cables cut clearance.
For sandwich layouts, use the side panel as the main intake or radiator mount, then exhaust out the opposite side or top. If the case has multiple passive vents, seal unused ones to prevent short circuits in airflow.
Full tower and high wattage GPU setups
Large interiors create pockets of still air. Solve that with focused intake placement:
– Three front intakes to build a wall of cool air.
– A bottom intake aimed under the GPU if the case allows.
– Two top exhausts and a rear exhaust to lift heat out quickly.
If you mount the GPU vertically, add a side intake to feed it directly. After layouts, the next variable that changes the plan most is radiator position.
AIO and Radiator Placement
Front vs. top mount trade-offs for CPU vs. GPU temps
- Front intake radiator: Delivers the coolest air to the CPU and drops CPU temps. It warms air before it reaches the GPU, so the GPU may run hotter.
- Top exhaust radiator: Removes heat from the loop and the case in one path. CPU temps may be a touch higher, but the GPU gets cooler front intake air.
Choose front intake if your work is CPU heavy, such as rendering or compiling. Choose top exhaust if you mainly game and your GPU draws 300 W or more. Keep slight positive pressure either way by ensuring the total intake CFM exceeds exhaust.
Push, pull, and push pull configurations
- Push: Fans push air through the radiator fins. Simple, effective, easy to clean.
- Pull: Fans pull air through the fins. Good when you need space between the panel and fan.
- Push pull: Fans on both sides reduce fin resistance and let you run lower rpm. Use it for dense radiators or restrictive fronts when you need every degree.
Start with push. Add pull only if temps demand it, because extra fans cost more, add weight, and may increase noise.
Tube orientation and pump placement guidance
Keep the pump lower than the highest point of the loop so air collects in the radiator, not the pump. For front mounts, position the tubes at the bottom if possible. For top mounts, the radiator naturally sits above the pump. Avoid sharp bends, secure tubes so they do not touch fan blades, and leave space for filter removal. With radiators sorted, panel style and filters decide how you maintain pressure and control dust.
Mesh vs. Glass Fronts and Dust Filters
Airflow penalties and how to compensate
Mesh fronts breathe easily and let you run lower rpm. Glass or closed fronts restrict intake and force higher rpm for the same airflow. To compensate in a closed front case:
– Use static pressure fans at the intake.
– Add bottom intake to bypass the restriction and feed the GPU directly.
– Keep top exhaust strong but not so strong that it turns pressure negative.
Filters and foam can cut intake by 10 to 30 percent. Account for that with extra intake fans or slightly higher intake curves.
Filter maintenance and pressure targets
Clean filters every two to four weeks with a handheld vacuum or a gentle rinse if the material allows. Replace torn filters; gaps defeat positive pressure. Target slight positive pressure for most rooms and stronger positive pressure in dusty spaces or homes with pets. That plan only works if the air path stays clear, so the next topic is cable management.
Cable Management and Obstruction Reduction
Shroud strategy, tie downs, and keeping the front path clear
Use the PSU shroud to store extra cable length. Route cables through grommets adjacent to the motherboard so they emerge close to headers. Keep the volume between the front fans and the GPU as clear as possible. Remove unused drive cages that block intake. Mount front fans roughly level with the GPU fans to minimize dead zones.
PCIe and front panel cable routing best practices
- Run GPU power cables along the card edge and through the nearest grommet.
- Bring the 24 pin cable around the board perimeter rather than across the airflow path.
- Use right angle adapters for tight USB C or SATA clearances.
- Avoid loops that sag into fans and use Velcro ties for easy future changes.
With the air route uncluttered, you can use smarter fan curves to reduce noise while targeting real heat sources.
Fan Curves and Control
Motherboard headers, hubs, and software control
Check how many PWM headers your motherboard provides and their amperage limits. If you have many fans, add a powered PWM hub. Keep case fans in PWM mode for smooth low rpm control. You can set curves in BIOS, vendor software, or trusted third party tools. Group intakes together on one header or hub and exhausts on another so you can tune them separately.
Sensor linked curves for CPU, GPU, VRM, and ambient
Tie front intake curves to the GPU sensor when possible. Intake needs to respond to GPU heat during gaming because the GPU drives most of the case heat. Tie top and rear exhaust curves to CPU or motherboard sensors to pull heat off the socket and VRM. If you can read ambient or VRM sensors, add a small rpm bump above 40 to 45 C to prevent heat soak. Use gentle slopes to reduce tone shifts that make PCs sound louder than they are.
Quiet vs. performance profiles and hysteresis
- Quiet profile: Keep fans near 600 to 900 rpm at idle. Ramp slowly through mid loads and hit higher rpm only under sustained heat.
- Performance profile: Higher baseline, faster response to spikes, useful for small cases and heavy overclocks.
Enable hysteresis or delays so small temperature bumps do not cause rapid fan surges. Smooth curves reduce noise and are easier to tune. After curves are set, verify results with quick tests and targeted troubleshooting.
Validation and Troubleshooting
Temperature targets and monitoring tools
Track CPU package, GPU core and hotspot, VRM, and SSD temps. Use tools such as HWiNFO or MSI Afterburner. Reasonable targets depend on ambient temperature, but common goals include:
– Idle: CPU and GPU under 40 to 50 C, with fans close to their minimum rpm.
– Gaming: GPU hotspot within 20 to 25 C of GPU core; front fans reacting to load.
– CPU stress: CPU stays under cooler limits without pushing case fans to max.
If you see high temps, verify the air path before swapping parts. Often, a fan move or curve tweak fixes the issue.
Smoke and tissue tests for visualizing flow
You can visualize airflow with simple tools:
– Hold a thin tissue or string near vents to see the direction and intensity.
– Use vape or canned smoke to trace paths. Watch for hot air recirculating into the top front fan or stalling under the GPU.
If you see backflow or swirling, adjust fan placement or curves. A small move often straightens the entire path.
Fixing hotspots, recirculation, and resonance
- GPU hotspot: Add or speed up a bottom intake, or increase front intake speed.
- CPU hotter than expected: Strengthen top exhaust, or move the radiator to top exhaust.
- Recirculation at top front: Shift the front top fan lower, or move the top fan farther back.
- Buzz or resonance at certain speeds: Reseat fans, add rubber pads, or avoid the narrow rpm range that causes the noise.
Make one change at a time and re test. That lets you attribute results and keep the wins while you refine the rest.

Conclusion
You now have a complete plan for the best fan configuration for pc case airflow. Start with a front intake, rear and top exhaust pattern, then aim for slight positive pressure. Choose static pressure fans for restrictive panels and radiators, and use larger fans where your case allows to lower noise. Place radiators to suit your workload, give the GPU direct fresh air, and keep filters clean so dust does not choke performance. Tie intake curves to GPU heat and exhaust curves to CPU and board sensors for fast, targeted response. Validate with simple tests and fix hotspots with small, focused changes. Follow this method and you will cut temps, noise, and dust while unlocking stable, long term performance.
Frequently Asked Questions
Is positive or negative pressure better for most PC cases
Slight positive pressure suits most builds. It pushes air out through gaps and keeps dust on filters, not inside the case. Run more or stronger filtered intakes than exhausts and clean filters often.
Should my AIO radiator be intake or exhaust
Choose based on workload. Front intake favors CPU temps but can warm GPU air. Top exhaust raises CPU temps slightly but keeps the GPU cooler. Maintain slight positive pressure either way.
How many case fans do I need for optimal cooling and noise
For a mid tower, start with two front intakes and one rear exhaust. Better yet, run three front intakes, one rear exhaust, and one top exhaust. Add a bottom intake for hot GPUs if the case supports it.